
This project is a collaboration between Brandon Monnig and I. Brandon installed a Factory Shift kit in his '93 VFR and photographed his install. I volunteered to write-up this article based on my install.
First off I'll give a little background. My '93 VFR has 22K miles on it (Feb 2002). I've noticed that if I'm lazy with my shifts I occasionally catch false neutrals (this can happen between any gear). Also, the feeling of the VFR gearbox is a bit mushy. I wanted something to improve the feel and make shifting more precise. Of course this is exactly what is listed on Factory Pro's site to describe their Pro shift kit. At $80 it's a bit steep, especially considering what you get. The kit comes with a new detent arm that uses ball bearings, a stiffer detent spring, and a new transmission cover gasket. Looking at the package I couldn't believe I had just spent $80 on this but it had been on my list of improvements for ages so here we go.
Let me tell you that I wasn't adequately prepared for how long this was going to take. The only mechanical work I do on my bikes are brakes/clutch, oil, tires (means pulling the wheels), and air filters. Pulling the water pump and digging into the transmission certainly wasn't in my repertoire and I was a bit nervous but it's not as hard as it looks/sounds. Just make sure you set aside a fair amount of time (it took me 8 hours and 6 beers but that included lunch and 'help' from 10 local VFR riders who had gathered at my place to perform maintenance on their bikes. Of course, we tend to spend more time yacking than wrenching so I would set aside about 5 hours and 4 beers (depending on how hot it is)). It's also a good idea to time this work w/ an oil change at the minimum and perhaps a coolant change as well.
Ok, so first you pull the plastic (mids and lower on my '93). When you can see everything in this picture you're ready. Go ahead and drain the oil and coolant (if you're doing coolant).

First you'll need to remove the slave cylinder and kickstand. Don't worry about the gasket on the slave cylinder. Nothing behind here is 'wet'. It's really just to keep dust/dirt out of the clutch. Below shows these 2 items removed.

Closeup of what's behind the slave cylinder.
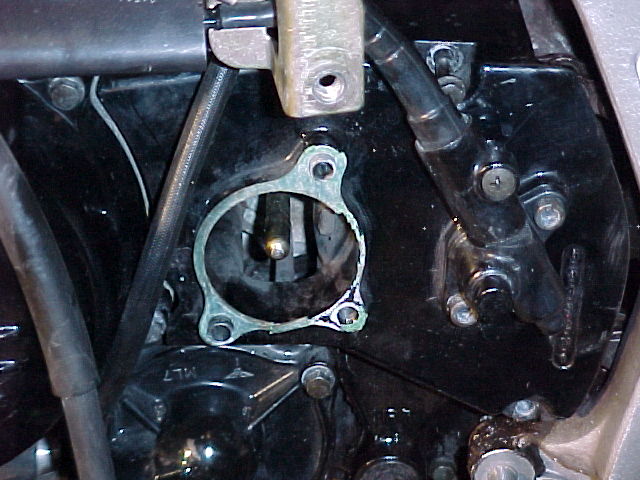
Next, remove the speedo drive and countershaft sprocket cover. That little nylon/plastic nut attached to the sprocket bolt is what occasionally strips causing a loss of your speedo. Afterwards you should see this:
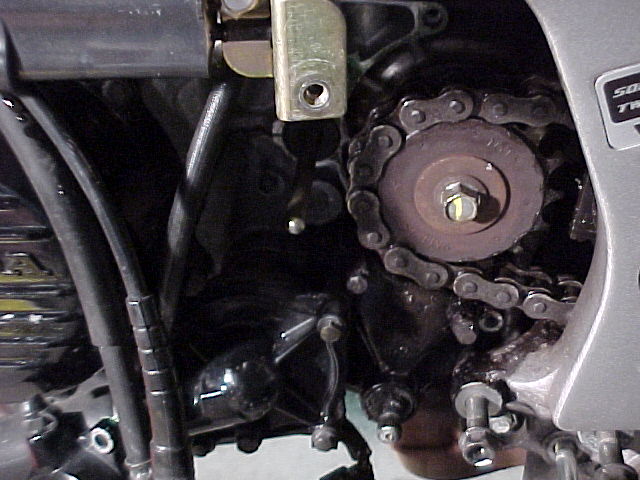
Now it's time to pull the water pump. Having it to do over again, I think you should be able to pull the whole water pump w/o splitting the 2 halves of the water pump itself. I removed the outside cover of the water pump (get ready to catch coolant splilling out), zip-tie'd it up to my fairing stay, and then removed the actual pump part (be ready to catch oil here - very little if you've drained the oil.). It took some wrangling to get the pump part out but it's only in there w/ an o-ring so just keep wiggling and it'll come out. You might be able to leave the 2 halves of the pump together and just remove the whole thing from the engine obviating the need to catch/replace coolant. Below you'll see the water pump removed. The hole w/ a bit of oil in it is where the water pump attaches to the engine.
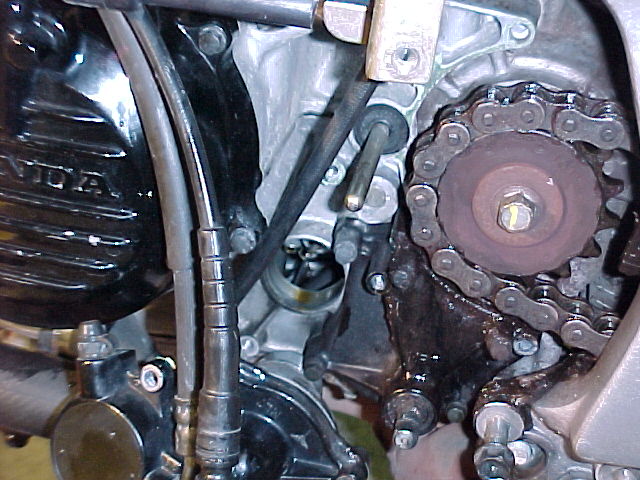
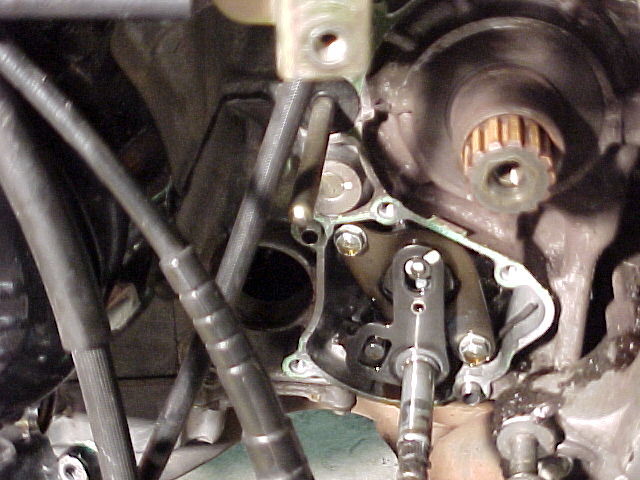
Next we need to get that front sprocket off. My suggestion is to remove the rear sprocket (you'll need a 6mm hex wrench and 14mm socket) to create slack in the chain. Put the bike in gear and break the front sprocket nut loose. Use the slack in the chain to slide the front sprocket off and get it out of the way. W/ that out of the way, you can pull the transmission cover. You'll get a little oil here and you can be sure the gasket will tear ;) This picture shows the transmission cover removed.
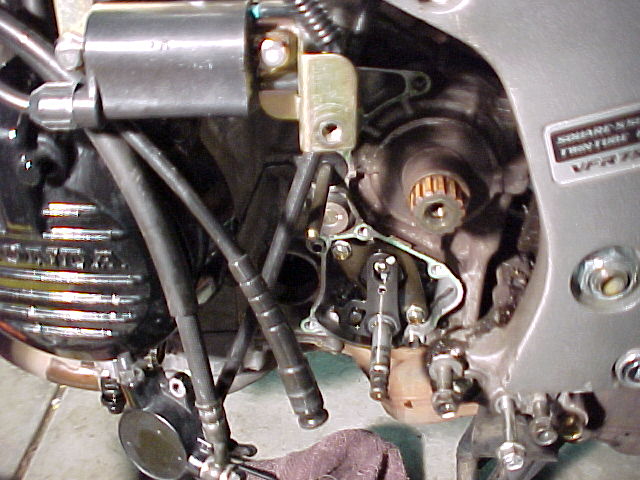
A close-up of the transmission
The shift lever shaft is next. Just slide it straight out and set it to the side. Don't touch the spring on there, that's not the one you're changing! Next you'll need to remove the 2 bolts and that gold-colored cover. This is what you should see:
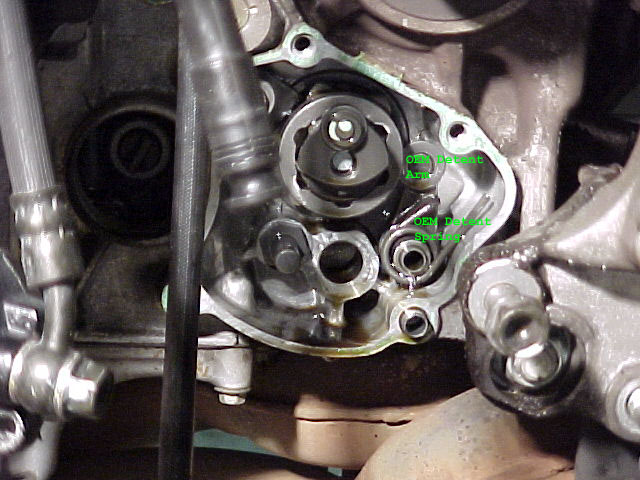
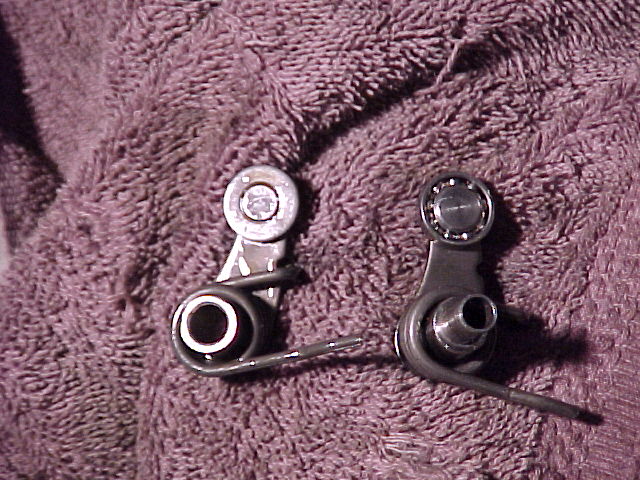
Now we're getting down to business. You'll need to remove the OEM detent arm and spring. W/ a little coercion, it should slide off its shaft. Here are the OEM and Factory detent arms and springs side by side:
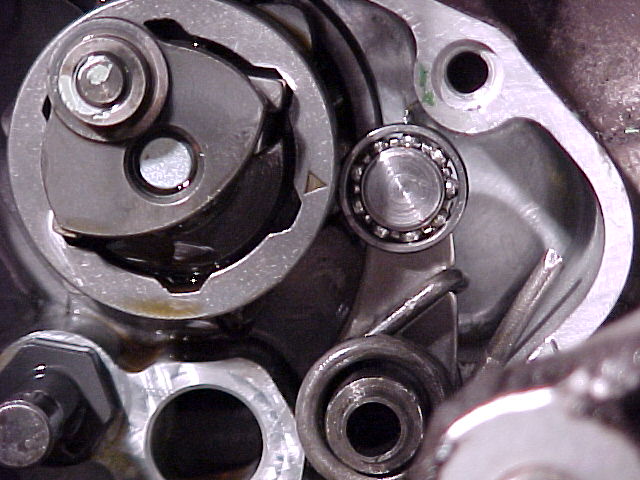
The new detent arm and spring should slide right back on the same shaft. Now it's just a matter of putting everything back together! Here's a pic w/ the Factory bits installed:
Make sure everything lines up when you reinstall that gold-colored cover. I bent mine a bit when I was putting it back on because the main mechanism had slid out from the engine a 1/4" or so if it doesn't seem like it's going on easily, recheck everything. After that's back in you'll need to remove the old gasket and install the new one. On the cover I used a razor blade to get the heavy stuff and then from 400-grit sandpaper laid on the garage floor n just swirled the cover on it till it was gasket-free. The engine side wasn't so easy ;) I used the razor blade as best I could and then my dremel w/ a wire wheel on slow speed to get the rest of it.
When you're finished removing the old gasket, install the shift lever and attach the transmission cover. Despite having a new paper gasket, I still put a tiny layer of RTV on both pieces.
You're on the home stretch now. Reinstall the front sprocket and chain, water pump, sprocket cover, speedo drive and clutch slave cylinder. If you didn't replace the coolant but some came out when you were R-and-R'ing the water pump, you'll need to 'burp' the system as you introduced air into the system. Open the radiator cap and top off the coolant. Start the engine and let it warm up. Once the thermostat opens you should get some bubbles coming up. After it's warm (gauge is above the C) and you don't see any more bubbles, shut it down, reinstall the rad cap, and top off both the rad and overfill tank.
Now just do your oil/filter change, reinstall the bodywork, and you're done!
Impressions: Definitely better feel. Shifting is indeed more definite and precise. I can even shift through all the gears w/ the engine off. I've only been riding a few days but I'm happy w/ the results. Idk if I'm $80 happy but this is one of those things that you don't really notice it working. The test will be if I notice not catching any more false neutrals even w/ lazy shifting.
UPDATE: September, 2002 I've put a few thousand miles since the shift kit installation and I have to say I'm very pleased with the result. I don't 'notice' the transmission anymore. Which was the goal after all. While I think Honda should have designed the shift mechanism like this in the first place, Factory is providing a useful aftermarket device.
 Back to Strider's Stable